Watch Our Garden Grow: Container plants
How did your country report this? Share your view in the comments.
Diverging Reports Breakdown
Watch Our Garden Grow: Container plants
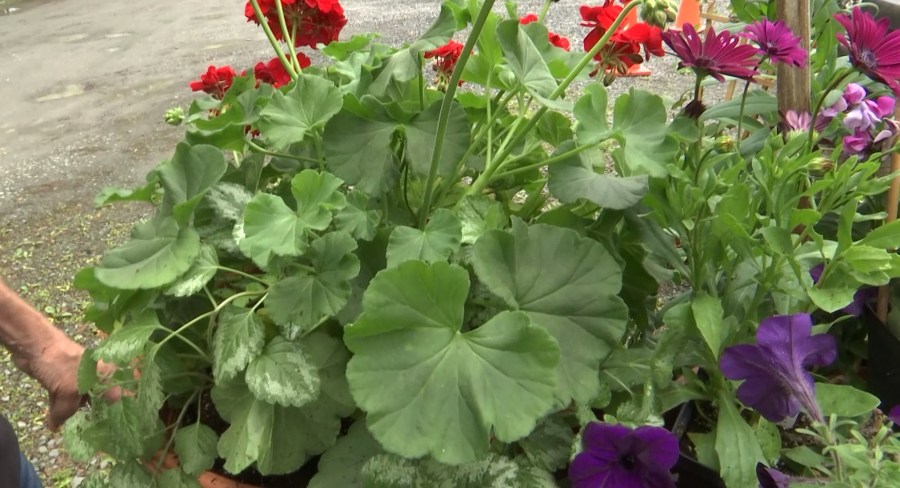
You can mix and match different plants or vines to make some pretty combinations. You can add different plants that you buy from a garden center to a bit pot to add other colors or textures. Or, you can put a hanging basket plant in there to give your garden a different look. The annuals you’ve only got them for the one season, but the perennials you’ve got, you know, multiple seasons.
You can add different plants that you buy from a garden center to a bit pot to add other colors or textures. Or, you can put a hanging basket plant in there.
Car seat inspections to take place in Steuben County
Advertisement Advertisement
Advertisement Advertisement
Hanging basket plants are root-bound, so you can turn your basket upside down and get the plant out in one piece with little trouble. Don’t forget to take off the plastic drainage! Then you can put it right in a pot and fill it with soil.
“You know, the annuals you’ve only got them for the one season, but the perennials you’ve got, you know, multiple seasons. So, I like to use things of texture in there that give your eye a visual stimulation of something different. Doesn’t always have to be flowers. And that’s the nice thing about it, and that’s why, when you see vines, and you see different things, it gives you options other than just something that flowers,” says Charlie Todd, owner of Chamberlain Acres.
New York State summer job program to aid youth from low-income homes
Gardening doesn’t have to be a chore. You can make your garden look unique and have fun doing it.
Advertisement Advertisement
Advertisement Advertisement
Copyright 2025 Nexstar Media, Inc. All rights reserved. This material may not be published, broadcast, rewritten, or redistributed.
For the latest news, weather, sports, and streaming video, head to WETM – MyTwinTiers.com.
How to Grow Blueberries: Plant, Prune, and Harvest Like a Pro
There are four types of blueberries: highbush, lowbush, hybrid half-high, and rabbiteye. The most commonly planted blueberry is the highbush. Most blueberry breeding has focused on this species, so there are many varieties that range widely in cold hardiness and fruit season, size, and flavor. Planting more than one variety can also extend the harvest season.Blueberries are partially self-fertile, so you will harvest more and larger berries by planting two or more varieties together. For withstanding cold winters, choose ‘Bluecrop’ or ‘Blueray’.
The most commonly planted blueberry is the highbush. Most blueberry breeding has focused on this species, so there are many varieties that range widely in cold hardiness and fruit season, size, and flavor.
Blueberries are partially self-fertile, so you will harvest more and larger berries by planting two or more varieties together. Planting more than one variety can also extend the harvest season.
Highbush (Vaccinium corymbosum): A six-foot shrub hardy from Zone 4 to Zone 7.
For withstanding cold winters, choose ‘Bluecrop’, ‘Blueray’, ‘Herbert’, ‘Jersey’, or ‘Meader’.
For big berries, choose ‘Berkeley’, ‘Bluecrop’, ‘Blueray’, ‘Coville’, ‘Darrow’, or ‘Herbert’.
For flavor, usually, the main reason for growing your own fruit, choose ‘Blueray’, ‘Darrow’, ‘Herbert’, ‘Ivanhoe’, ‘Pioneer’, ‘Stanley’, or ‘Wareham’.
For something different, try ‘Pink Lemonade’, which produces bright pink blueberries!
Lowbush (Vaccinium angustifolium): For the coldest climates, lowbush varieties are your best bet, hardy from Zone 3 to Zone 7.
These are the blueberries you find in cans on supermarket shelves. When fresh, the fruits are sweet and covered with a waxy bloom so thick that the berries appear sky blue or gray.
The creeping plants, a foot or so high, are spread by underground stems, or rhizomes. They blanket the rocky upland soils of the Northeast and adjacent portions of Canada. Lowbush blueberries make a nice ornamental fruiting ground cover.
Plants sold by nurseries are usually seedlings or unnamed wild plants rather than named varieties.
Half-High: Breeders have combined qualities of highbush and lowbush blueberries into hybrids known as half-high blueberries.
The University of Minnesota introductions include ‘Northcountry’,v a variety that grows 18 to 24 inches high and has excellent, mild-flavored, slightly aromatic sky-blue fruits; and ‘Northblue’, which grows 20 to 30 inches high and produces an abundance of dark-blue, nickel-size, somewhat tart fruits-just right for pies.
‘Northland’ is a half-high that grows 3 to 4 feet tall. From Michigan, it has relatively bland, average-quality fruit.
Blueberries for Southern Gardens (Zones 7–9):
Planting, Growing, and Harvesting Potatoes
Garden potatoes can be planted 2 to 4 weeks before the average last frost date. The soil temperature should be at least 55°F during the day and 45°F at night. Use certified (disease-resistant) seed potatoes from which eyes (buds) protrude. Do not cut up seed potatoes that are smaller than a hen’s egg; plant them whole. Use a clean, sharp paring knife to cut large potatoes into golf ball-size pieces, with one to two eyes each. This time allows the pieces to heal or form a protective layer over the cut surface. In the fall, mix compost or organic matter into the soil. Learn more about compost, soil amendments, and preparing the soil for planting.
Garden potatoes can be planted 2 to 4 weeks before the average last frost date. The soil temperature should be at least 55°F during the day and 45°F at night. However, pay more attention to the soil than the calendar to determine planting time. The soil should not be so wet that it sticks together and is hard to work. Let it dry out a bit first. If you have a late and wet spring, you can plant later, through April (depending on location) or even June, especially in containers.
In cooler regions, the early-maturing potatoes are usually planted early to mid-April. In warmer regions, planting times range from September to February; in central Florida, gardeners plant potatoes in January; in Georgia, they plant in February.
See our Planting Guide for the best dates to plant by zip code or postal code.
How to Plant Potatoes
Potatoes for planting are called seed potatoes and are usually sold in bags or netting. Use certified (disease-resistant) seed potatoes from which eyes (buds) protrude. Do not confuse seed potatoes with potato seeds or grocery produce.
When you get them, break them free, lay them out in a tray (such as an old egg carton), and pop them somewhere bright and frost-free to sprout, such as an indoor windowsill. This is a process called chitting. It’s not essential, but chitting helps speed things along so that by the time the potatoes are planted, they’ll be primed and itching to send out roots.
As the video below shows, after a month of chitting, the potatoes produced stout, stocky, green sprouts, which is exactly what we’re after; we don’t want the long, pale sprouts you get when potatoes are left in the dark. But if you haven’t had a chance to chit your potatoes and it’s already time to plant, don’t worry—get them in the ground.
A great way to get more seed potatoes for free is to cut them in half. But only do this if they’ve got plenty of eyes, which appear as small dimples and are where the sprouts emerge from. For this reason, you want to place the end with the most eyes facing upwards.
At least 2 days before planting, use a clean, sharp paring knife to cut large potatoes into golf ball-size pieces, with one to two eyes each. This time allows the pieces to heal or form a protective layer over the cut surface, improving both moisture retention and rot resistance. Do not cut up seed potatoes that are smaller than a hen’s egg; plant them whole.
You’ll need a location with at least 6 hours of direct sunlight and fertile, loose, well-draining soil; hard or compacted soil leads to misshapen tubers. Ideally, the soil is slightly acidic (pH 5.8 to 6.5), and the soil temperature is at least 45º to 55ºF (7° to 13°C). In the fall, mix compost or organic matter into the soil. Learn more about compost, soil amendments, and preparing the soil for planting.)
Outside, prepare the planting area by simply spreading compost across the surface to a depth of around an inch or 3 cm. Potatoes are fairly hungry plants, so this extra nourishment will help to support good soil fertility and a strong harvest.
4 Methods of Planting Potatoes
There are different approaches to planting potatoes:
Grow a Garden codes for May 2025
Grow a Garden codes give you free rewards, like Seedpacks, which will help you in this Roblox game. As of the 29th May, there are still no active codes. We thought we might see a new one land as part of the Farm Cosmetics event, but not as of yet. We’ll continue to keep an eye out for new codes, and we’re hoping we’ll see one aspart of the upcoming Bizzy Bees event. If you get the message ‘Code Is Not Active!’, then the code has expired. If the code you’ve entered is valid, you’ll receive your reward.
Grow a Garden is all about creating and cultivating your own garden. Yet there’s more to the game than simply planting flowers! There are mutations to experiment with, pets to collect and all sorts of seeds to grow. Though you need to make sure you’ve got the right gardening gear too.
The true joy of Grow a Garden, however, is that you’ll be able to watch your plants spring to life in real time. Who knows, maybe the Grow a Garden codes will help you garden truly flourish.
Below you’ll find a list of the working Grow a Garden codes, along with how to redeem them.
On this page:
To see this content please enable targeting cookies. Manage cookie settings
All working Grow a Garden codes
As of the 29th May, there are still no active codes. We thought we might see a new one land as part of the Farm Cosmetics event, but not as of yet. We’ll continue to keep an eye out for new codes, and we’re hoping we’ll see one as part of the upcoming Bizzy Bees event.
All expired Grow a Garden codes
LUNARGLOW10 – 3 Basic Seedpacks
How do I redeem Grow a Garden codes?
Don’t know how to redeem codes in Grow a Garden? No worries, we’re here to teach you how to redeem codes in Grow a Garden:
Launch Grow a Garden in Roblox. Click the gear icon in the top-left hand corner to open the ‘Settings’ menu. It’s to the left of the backpack. Image credit: The Garden Game / Eurogamer Type your code into box at the bottom of the menu. And click ‘Claim’. Image credit: The Garden Game / Eurogamer
Grow a Garden code not working?
If the code you’ve entered is valid, you’ll receive your reward. However, if you get the message ‘Code Is Not Active!’, then the code has expired. And if you get the message ‘Code is Invalid!’, then it’s likely the code hasn’t been entered correctly.
For a good while the code LUNARGLOW10 worked, but was turned off by the developers due to players finding a way to exploit it, so while you’ll see that code around the web, it doesn’t actually work – for now, at least.
Where to find more Grow a Garden codes?
While this page will be kept up-to-date with the latest Grow a Garden codes, you can always go hunting for them yourself on the fan account on X and the game’s official Discord. Good luck with the Discord though, it’s full most of the time.
If you’re looking for more Roblox codes, we’ve got lists of the latest Anime Power codes, Azure Latch codes, Anime Vanguards codes, Volleyball Legends codes, Arise Crossover codes and SpongeBob Tower Defense codes.
How to Grow Green Onions (Scallions): Planting, Growing, and Harvesting Tips
Sowing Green Onions requires a sunny, open site and fertile, well-draining soil. For best results, grow them in soil that’s been improved with regular additions of well-rotted organic matter such as compost. These tall, thin plants don’t take up much space, so they’re ideal for containers. Start sowing under cover in late winter, then continue outside in the spring. Sow short rows every 3 to 4 weeks to give a steady supply of oniony stems. Your last sowings, made at the very end of summer using a winter-hardy variety, will be ready to harvest early next season.
Like their bulb-forming cousins, green onions prefer a sunny, open site and fertile, well-draining soil. For best results, grow them in soil that’s been improved with regular additions of well-rotted organic matter such as compost. Check out our guide to composting at home.
These tall, thin plants don’t take up much space, so they’re ideal for containers. Or be opportunistic and grow them between rows of slower-growing vegetables such as parsnips until they need the extra space. Another option is to grow them with carrots, which may help to reduce problems with carrot rust flies.
Start sowing under cover in late winter, then continue outside in the spring. Sow short rows every 3 to 4 weeks to give a steady supply of oniony stems. Your last sowings, made at the very end of summer using a winter-hardy variety, will be ready to harvest early next season. Learn more about vegetables to plant in the late summer.
Sow seeds directly where they are to grow or into containers of potting soil to transplant later on.
Direct Sowing Green Onions
Direct sow seeds into finely-raked soil. Mark out a drill about half an inch (1 cm) deep. Use a string line if you prefer neat, straight rows. Additional rows should be spaced about 4 inches (10 cm) apart. If it’s hot and dry, water along the rows before sowing. This creates a cooler environment around the seeds, helping them to germinate.
Sow the seeds thinly along the rows, then pinch the drill closed to cover the seeds. Alternatively, backfill the rows with potting soil. This is useful if your soil isn’t as fine and crumbly as you’d like at sowing time, and also helps rows to stand out clearly from the surrounding soil for the purposes of weeding. Once you’re done, label the rows and water thoroughly.
Sowing in Plug Trays
Sowing into containers helps make the best use of your available space because you can start seedlings off while a growing crop still occupies the ground. By starting plants off under the protection of a greenhouse, tunnel, or cold frame, you’ll be able to start sowing up to 6 weeks sooner at the beginning of the growing season.
The easiest method is to use plug trays. Fill your plug trays with a general-purpose potting mix, then firm the mix down into the modules with your fingertips. Sow a pinch of four to eight seeds per module, then cover them with potting mix. Water and keep the potting soil moist as the seedlings appear and grow.
Transplant the clusters of seedlings as soon as they have filled their modules, and you can see roots at the drainage holes. Carefully ease the plugs from the tray, then plant them into prepared soil so each cluster is 2-4 inches (5-10 cm) apart within the row, with rows spaced at least 4 inches (10 cm) apart. Water the young plants to settle the soil around the root ball.
Source: https://www.mytwintiers.com/watch-our-garden-grow/watch-our-garden-grow-container-plants/